

This article is no longer updated.
Please go to our new Intercom knowledge base to ensure you're seeing the most recent version.
The link above takes you directly to the equivalent article on Intercom.
Photos of students can be imported by selecting Settings (the gear icon) > System Admin > Import Photos. (For version 9.111 and earlier use Tools > System Admin > Import Photos.)
All the photos must be jpg format, have the Student ID as their file name and be contained in a single folder.
The script opens a dialogue box.
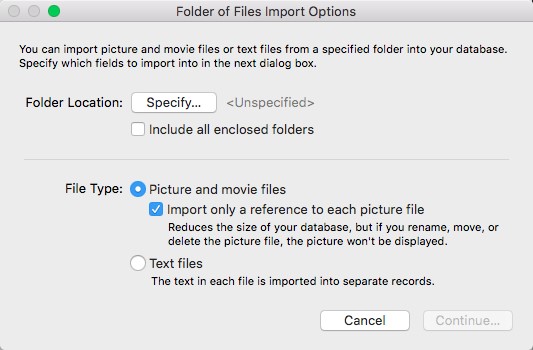
Select Specify then the folder the photos are in.
On continue, the Specify Import Order dialogue box will open. The options should match those below.
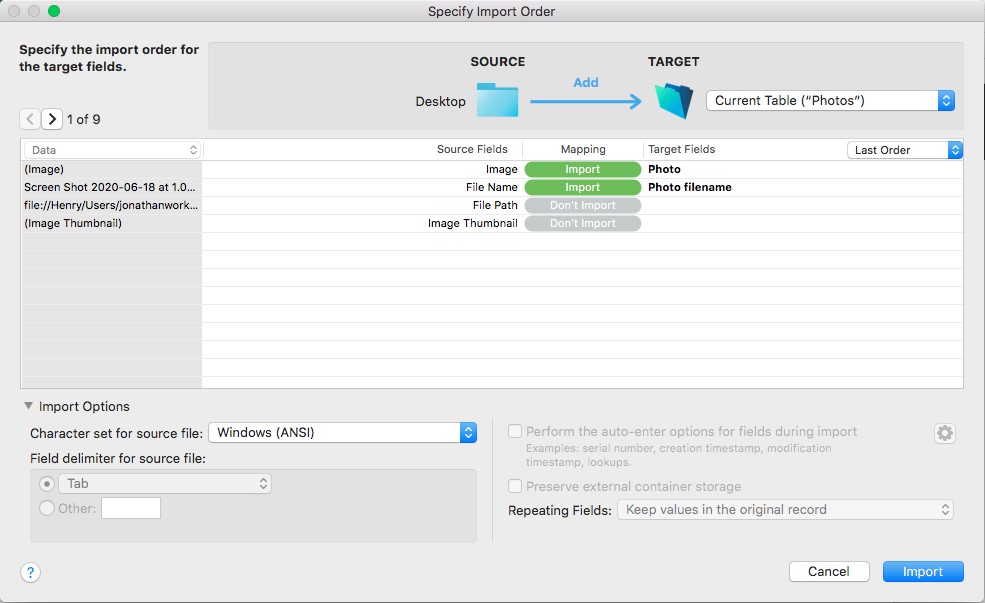
The photos will be imported when Import is selected.